Ken Stockman's Standpipe Implementation
While not a modification of the Durso Standpipe itself, this type of standpipe is effective in external overflows.
The Durso Standpipe can be modified to fit into an external overflow, but we do not sell them for this purpose.
Flow Diagram of External Overflow and Stockman Standpipe
This was created by Ken Stockman. The concept of a submerged water intake with controlled air-intake concept is the same as the Durso Standpipe, however the method of solving the problem is different.
What You Need
Tools: Dremel, drill, miter saw (optional), tubing cutter or hacksaw
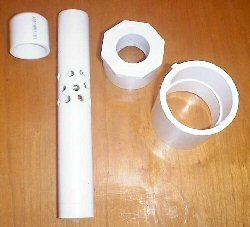
Parts:
- 12" piece of 1" PVC
- 2" PVC union fitting
- 2" to 1" reduction fitting
- 1" end cap with a 1/8" hole drilled in the top
Construction
With a Dremel tool, sand paper, or a knife, grind down the lip of the reducer fitting on the inside of the 1" portion. This will allow the 1" pipe to slide into and through the reducer fitting.
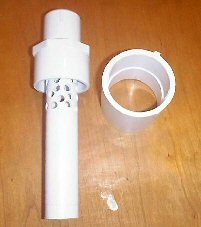
Align the 1" pipe with the reducer fitting so that about 1" of the tube sticks through the top of the fitting. Mark the pipe so that when holes are drilled in the pipe they will be above the 2" union fitting. This is important! Notice in the picture how none of the holes are visible after assembly.
Drill the holes in the pipe with a 3/8" drill bit. Then slide the tube into the reducer fitting. Alternatively, use a miter saw to cut an opening in the side of the pipe that is 1" by 1" (see the flow diagram above). This is the preferred method because there are no small holes that can be clogged with detritus or algae. If you see your water level line rising clean out the standpipe.
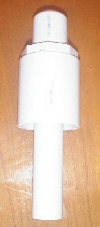
Slide the pipe into the reduction fitting so that enough of the pipe sticks out to fit on the end cap.
Drill a hole in the top of the end cap such that the hole can be fitted with a plastic needle valve (from That Pet Place for ~$1). Slide on the 1" cap. I have used a needle valve, but have found that just a couple of 1/8" holes work just as well.
Slide on the 2" union fitting.
Gluing is not necessary.